Here, we will discuss how to build, host, and manage professional WordPress websites with the help of artificial intelligence. We will use 10Web hosting and management services. 10Web is an AI website builder, which helps you to create or migrate any WordPress website without accessing its database or admin panel. So, this post is perfect if your developer has disappeared or you need a low budget website with a premium appearance and style.
How to Build, Host, and Manage a WordPress Website Using 10Web?
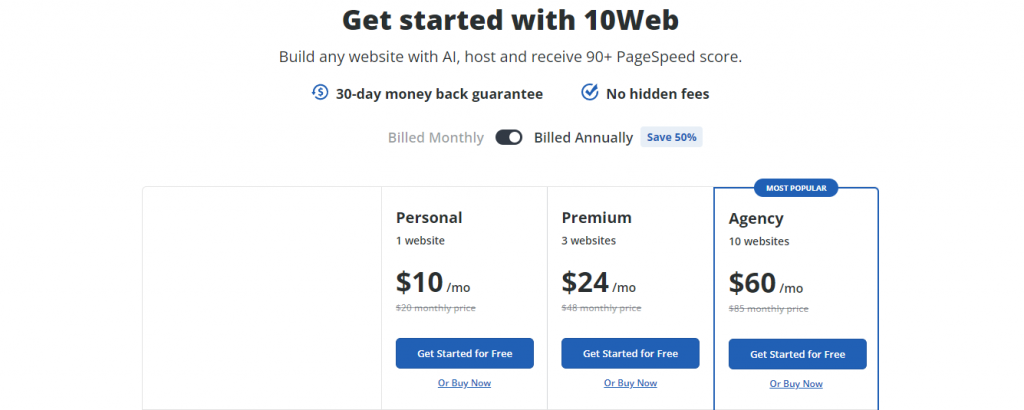
The first step is to create an account on 10Web. Signing up is easy. It has three plans and the most expensive one comes with higher storage, support for more visitors, and VIP support. Apart from that, the features are almost the same for all three packages. For today’s project, we need a pocket-friendly Personal plan.
Click on Get Started for free under the 10Web Personal pack. Log in with your Google ID or any other email address. Describe yourself by choosing one of the given options on the next page.
Next, you have to select the number of websites you manage and how you came to know about 10Web.
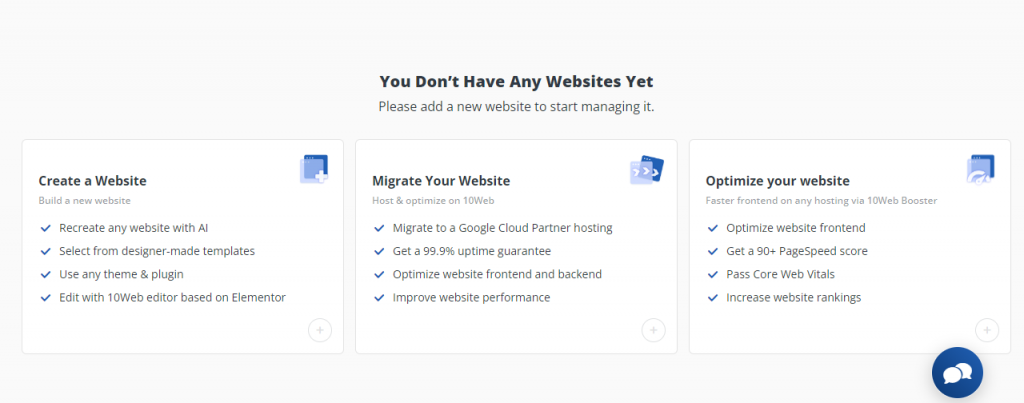
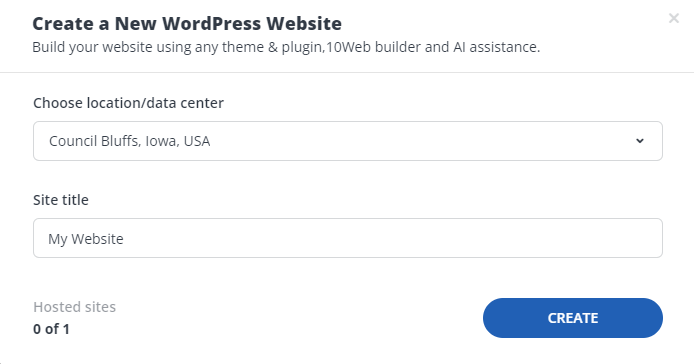
Click on the first box – Create a Website.
Enter the website’s name and choose a data center. Pick a DC that’s closest to your main traffic. If you are getting most of the traffic from the USA, select a DC in the USA. Similarly, go for a DC in the UK if your traffic amount is high from the UK. Click Create.
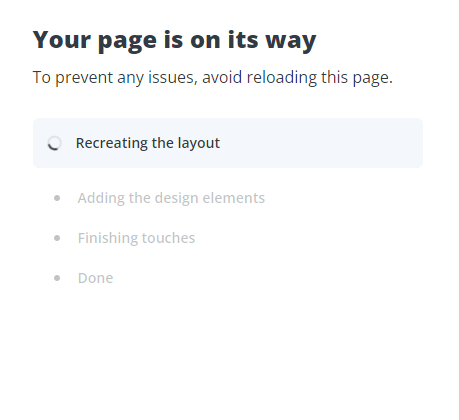
10Web installs a blank website on its Automated WP Hosting and completes some other tasks. You are done.
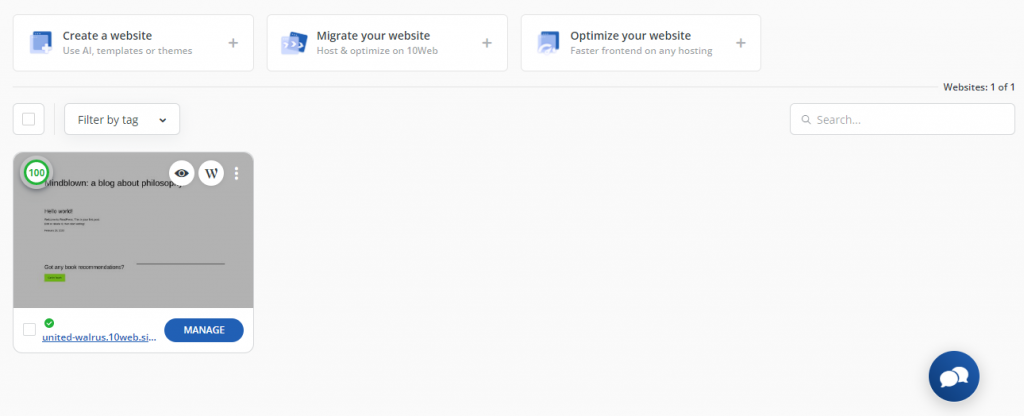
Click on Great or done to get into the management panel. You can check the website’s loading time on desktop and mobile by hovering your mouse on the green circle.
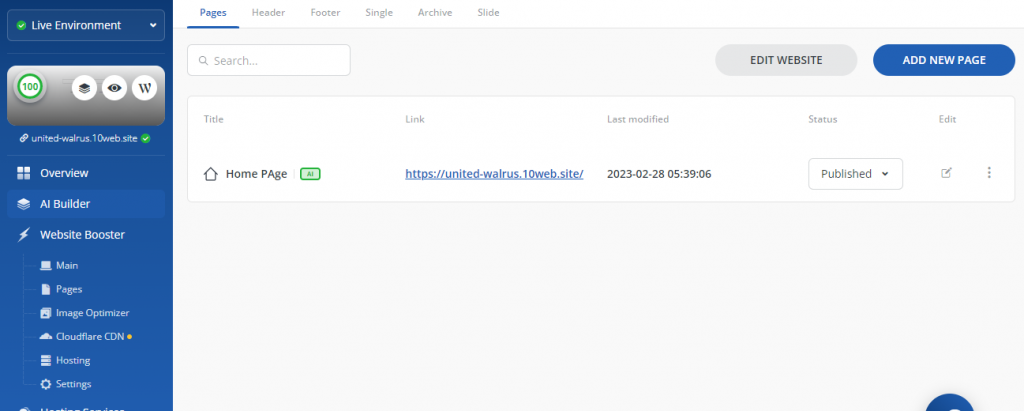
Select AI builder from the left menu. It’s the place where you can create and add pages to your website. You can either create new pages from scratch or copy them from another website.
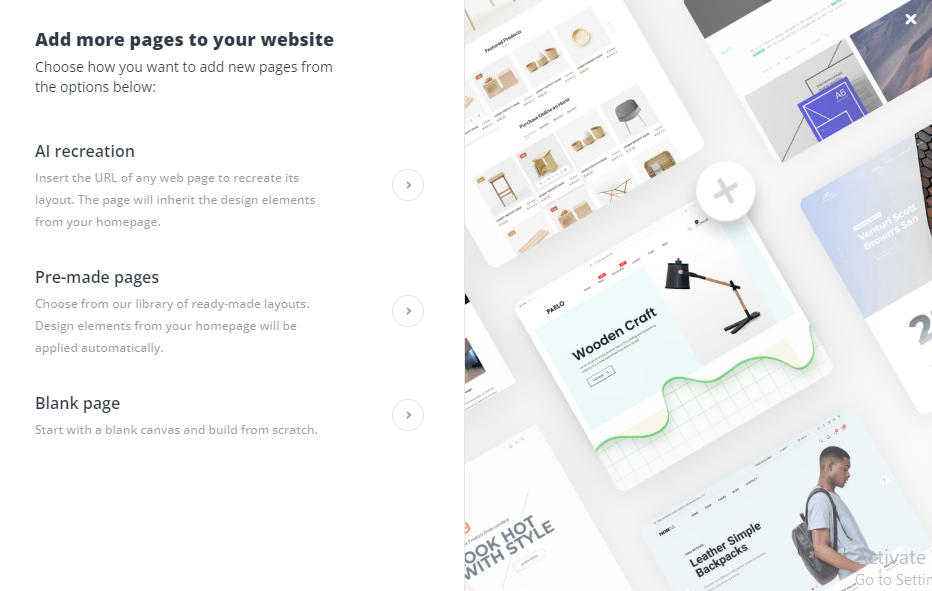
Click on Add New Page from the left pane. A window pops up with three different options.
AI recreation
Use this method if you want to recreate a web page. Its usage is easy.
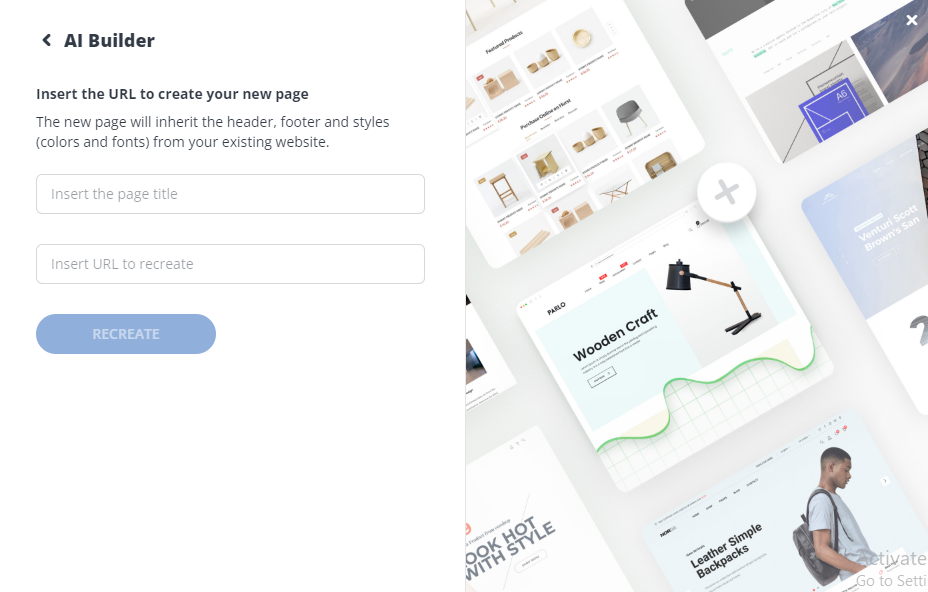
Select AI recreation, and insert the page title and the URL you want to recreate. 10Web accepts the URL only in http:// and https:// format.
Click on Recreate after filling in both boxes.
The AI builder runs through a checklist and gives you a pop-up to Preview the site.
Click on Preview to see the recreated page on a new tab. You can also edit the page from your management panel’s left pane.
10Web comes with Elementor, which is a user-friendly drag & drop editor. So, you can use it even if you do not have a website design background.
Check the new page and tweak it as per your needs. You might not have to spend a lot of time customizing the web page because 10Web does an excellent job in general.
As you can see, AI recreation generates a replica page of any URL you enter. It does not need access to databases to make the copy. Once you are ready with the website, you can also host it on 10Web. Update your nameservers to switch your website to live.
Point the Domain
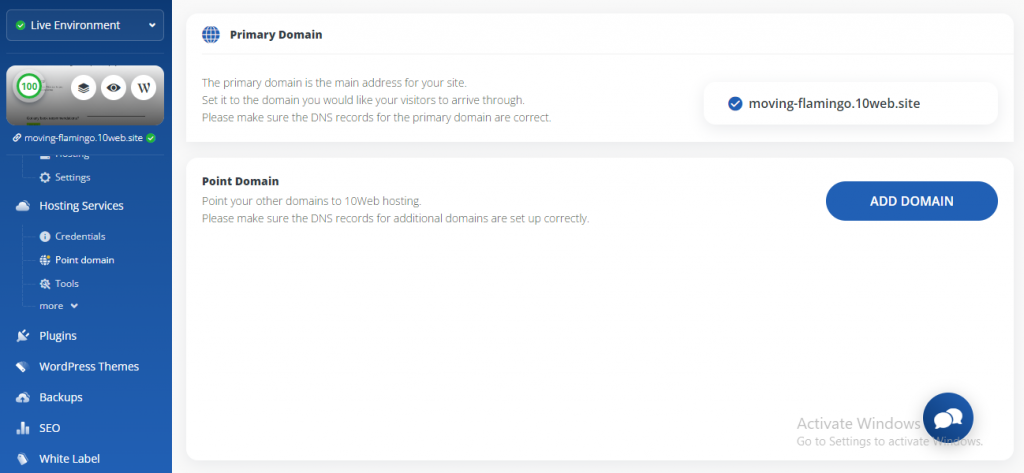
Once you create or copy a website on 10Web, the next and final step is to point your domain to 10Web.
If you want to add a new domain, browse Hosting Services on the left menu and select Domains. If you have not added any domain yet, then the option will be the Point domain. Purchase a new domain if you do not have one.
Step 1: Add the domain
Login to your 10Web dashboard, and select the site you want to edit.
Look for Hosting Services and click Point domain.
Select Add Domain from the left pane and follow the steps.
Step 2: Point the domain
You can point your domain via Nameservers and A records. The former links your domain name to an IPv4 address. Nameservers store all the DNS records. You have to point your domain with the help of 10Web nameservers.
Point with nameservers
- Login to your 10Web dashboard. Click on the website you want to point to 10Web.
- On the left of the dashboard, browse under Hosting Services and select Point on domain.
- Click on Add Domain. Enter your domain and click Add Domain. Once your domain is added to your site, you will see a window with four nameservers.
- Login to your domain registrar. Click on the domain you want to point to 10Web and navigate to the bottom of the page to find Manage DNS records. Select this option.
- Find the Nameservers block and click Change> Enter my nameservers.
- Copy the 10Web nameservers and replace the domain registrar nameservers.
- Click Save and then Continue. The changes become effective within around 24 hours. The process of nameserver change varies according to the domain registrar.
Point with A records
- Login to your 10Web dashboard and click on the site you want to edit.
- On the left side, browse under Hosting Services and select Point a domain, then click Add Domain.
- Enter your domain and select Add Domain.
- Sign in to your domain registrar. For instance, if you have purchased a domain from Hostinger, sign in to your Hostinger account.
- Click on the domain you want to point to 10Web, navigate to the bottom of the page, and click Manage DNS.
- On the Records page, click on Add and select A record.
- Browse to your 10Web dashboard and click on Credentials, available under Hosting Services and copy the IPV4 address.
- Browse back to the dashboard of your domain registrar, type @ inside the Host box, and paste the IPV4 address in the point-to field. Set the TTL to one hour and click save.
Step 3: Make your new domain primary
Once the address is resolved, the next step is to make your new domain primary. Find the new domain under the Domains page of your 10Web dashboard and click Make Primary. Confirm the selection and you are done. Your domain is pointed to 10Web.
Step 4: Generate an SSL certificate for free
Hover under Hosting Services on the left side of your 10Web dashboard and select Tools.
Find the option of SSL certificates, click on the drop-down menu, and select Generate a free SSL certificate.
A pop-up window comes up to select the domain where you need the SSL installed and click Apply.
Add a custom SSL certificate
10Web provides free SSL to all your websites. You can also use a different SSL certificate if you already have one. Before adding a custom SSL, make sure your domain is live.
- Almost all the SSL providers generally email the .key, .cert, and .ca bundle after issuing an SSL certificate. Open them one by one using Notepad.
- Login to your 10Web dashboard.
- Click Manage on the site where you want to add a custom SSL certificate.
- Click Tools under Hosting Services.
- Find the section on SSL certificates, click on its drop-down menu to select Add custom SSL certificate.
- Copy and paste the content of the .key document in the upper field.
- Similarly, copy and paste the data of the .cert file into the lower field. Finally, copy and paste the .ca_bundle below .cert file content in the same field.
- Click Add certificate.
Verify the SSL certificate
After installing a custom SSL certificate, we recommend you verify it to make sure everything is configured correctly. If you see any errors, remove the incomplete certificate and add a new custom SSL. An SSL certificate is crucial. Otherwise, your visitors might not browse your website due to security warnings.
You might not see the security warnings seen by others. Therefore, use a third-party SSL certificate verification tool to check if it’s configured correctly. Access the SSL verification tool. Enter the URL of your website in the search box and click Submit.
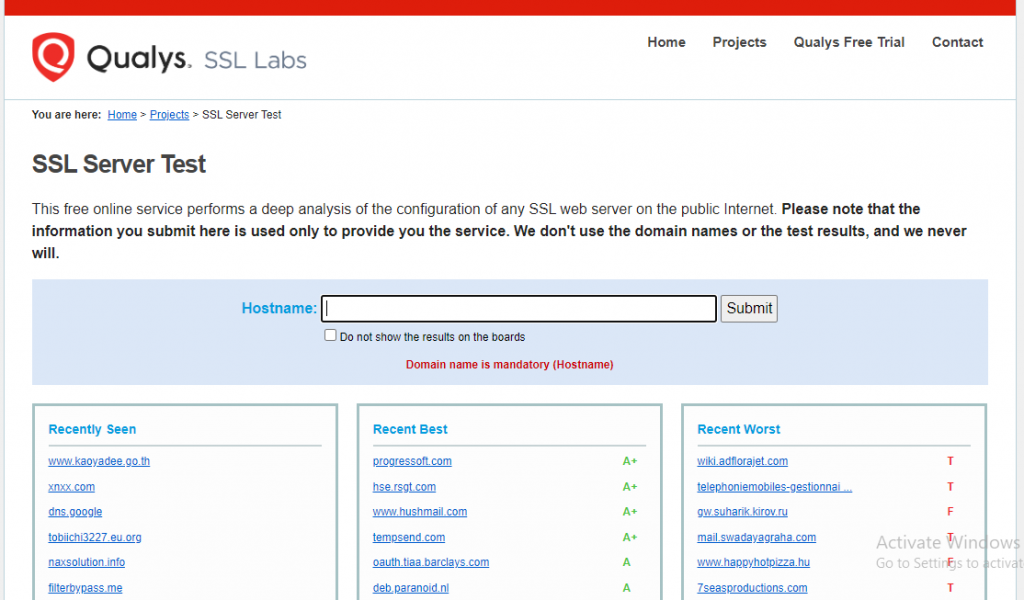
The tool completes the SSL certificate verification within a few minutes. It shows the results on the grade of A to F. As you can guess, grade A means the primary domain and intermediate certificates are installed without any misses. If the grade is lower than A, the tool shows you the reasons.
A result lower than A represents an Incomplete Certificate Chain error. It might happen if you configure the SSL without intermediate certificates from the .ca bundle. So, remove the existing SSL and reinstall a new one with all the required certificates.
Remove an existing SSL certificate
- Login to your 10Web dashboard.
- Click Manage on the site where you are facing issues with the SSL certificate
- Select Tools under Hosting Services.
- Look for the section of SSL Certificates, click on its drop down menu, and select Remove SSL certificate.
- Confirm your selection by clicking on Yes, Remove.
Functions of 10web Dashboard
Restore Points
Click on Restore points to see the backups. 10Web automatically backs up your site every day. It creates 10 restore points within a limit of 20 GB.
The Backups section lets you schedule automated real-time backups. You can schedule daily, weekly, or monthly backups. It also allows you to perform incremental backups to save space. The restoration of the backup version can be done within a few clicks.
Backups are crucial because you might not know instantly if anything goes wrong with your website. The mess-up happens generally due to plugin updates, hacking attacks, and many more factors. The backups help you to clear the disorder.
SEO
The SEO tab gives you multiple options once you enable it. This section lets you manage custom metadata, canonical URLs, XML sitemaps, and redirects.
White Labels
White labels are only available in the 10Web Agency plan. It’s useful if you manage the websites of your clients. Apply white labels and let 10Web do all the heavy lifting. However, your customers see your organization’s name instead of 10Web.
10Web Booster
Website Booster eliminates speed-related issues. You can check its status and details by clicking on Main under Website Booster. Page and Image optimizers are subdivisions.
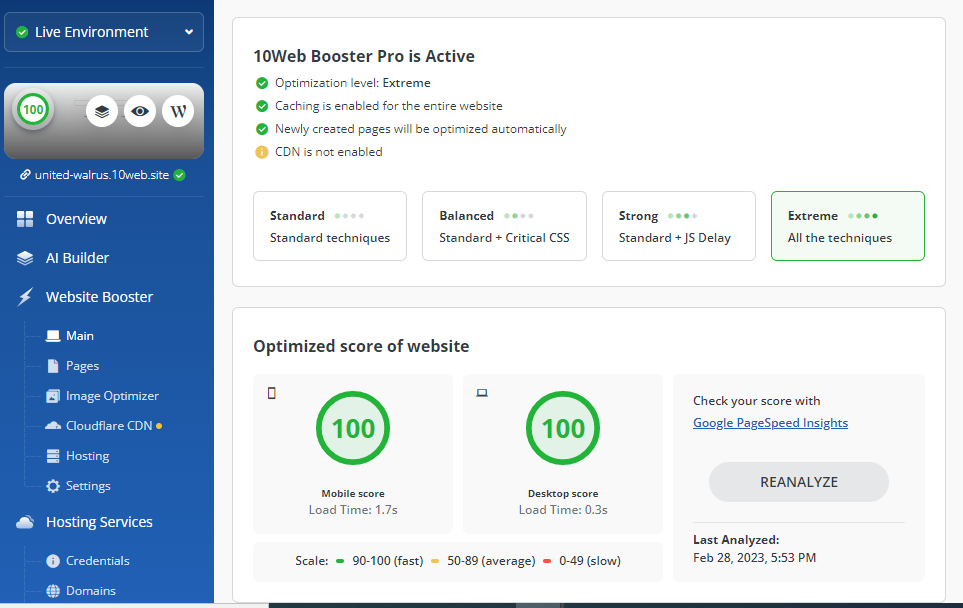
Website Booster is also available for professional WordPress websites. You can use it without having a 10Web account. Try the Booster as a plugin and enjoy more than 90 PageSpeed on your WordPress sites.
Here comes the good news. 10Web also has arrangements to optimize the backend of your website. Click on Hosting to see the details. However, it can only function if your hosting provider is 10Web. The backend optimizer becomes ineffective if your website is hosted with any other brand.
Plugins
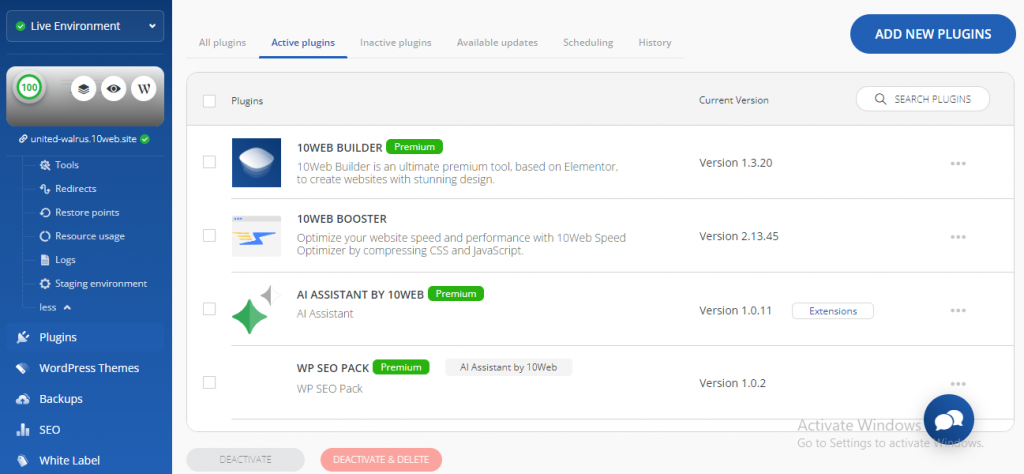
10Web has a wide range of free and premium plugins. Login to your 10Web dashboard and click on the site you want to edit. Then, access and manage them from the option Plugins on the left pane. You can also update the plugins by checking the Available Updates.
Here, you can update all the plugins. You can also install new plugins. In addition, this section has options to activate, deactivate and delete existing ones.
Install new plugin
Click on Add New Plugins, on the top right of your 10Web dashboard. You can search & install and upload plugins in the next window. It also lets you check for updates and schedule automatic & safe plugin updates. Installing a plugin is easy, click on the Install option in its front. For the paid ones, select Install Premium.
Click on the Upload tab and select a plugin file to upload it.
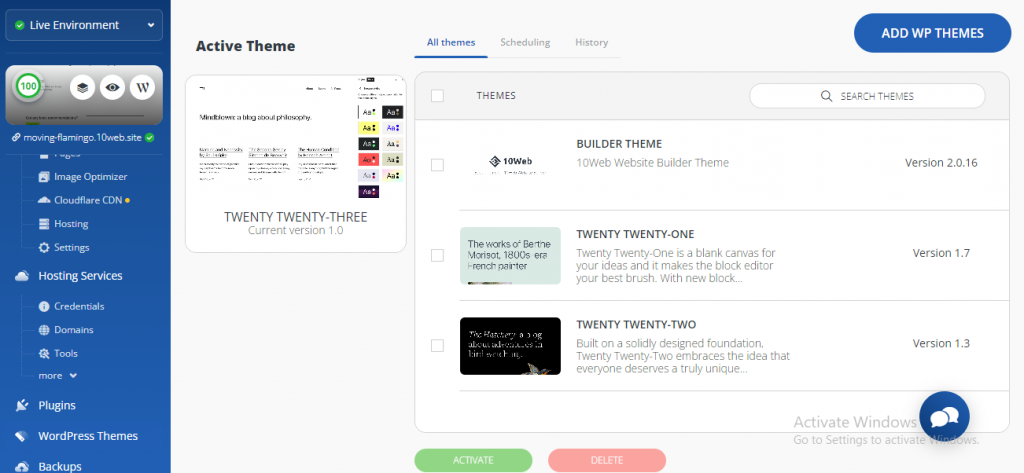
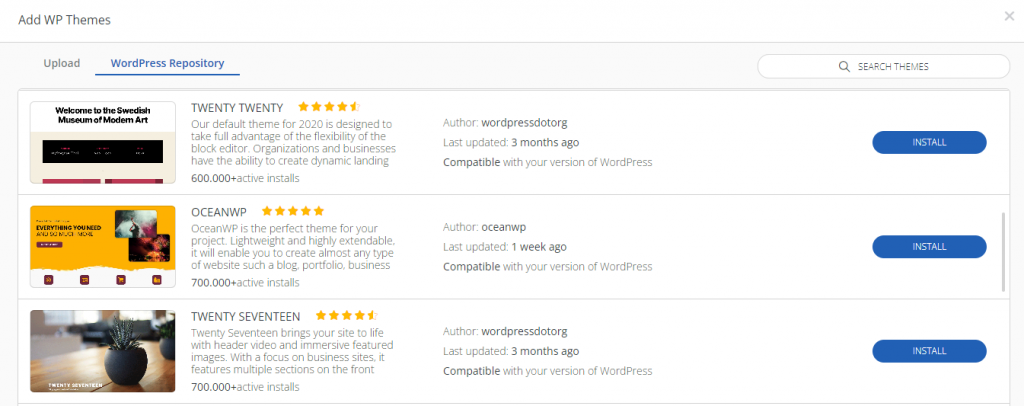
WordPress Themes
You can access the installed themes by clicking on WordPress Themes on the left pane. This section shows you the active theme, activate any other installed theme, delete the installed themes, upload themes, and install themes from the WP repository. What’s more? You can also schedule theme updates and check the scheduling history.
Install a new theme
Click on Add WP themes, which is available at the top right corner of your 10Web dashboard, below your profile image.
Now you can either search for themes in WordPress Repository or you can upload one of your themes.
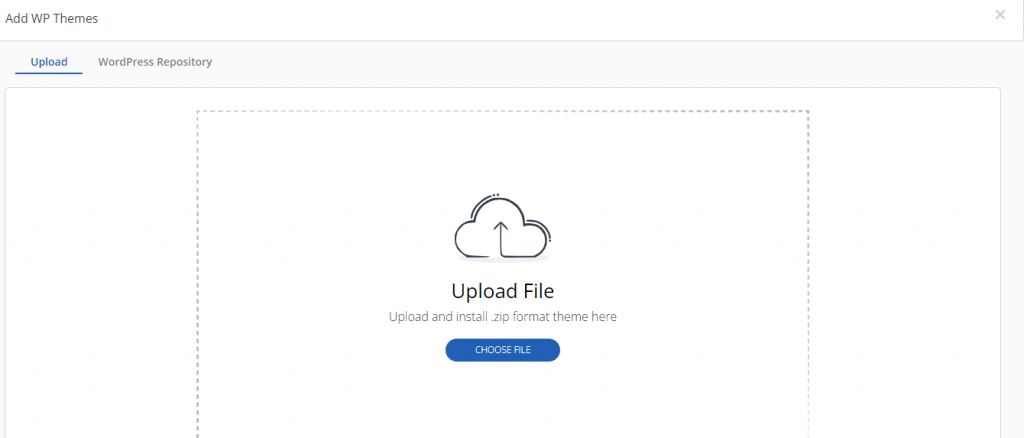
Click on Install once you have the theme.
You can check all the installed themes under All Themes. Put a checkmark against any one of them to activate or delete.
FAQs
What is the best AI tool to build websites on a low budget?
We have a lot of AI-based website builders to try. Most of them can create impressive and fully-functional websites without much hard work. However, 10Web is the best AI tool to build websites because of its unique features.
10Web lets you migrate any of your sites to WordPress. Enter the target URL and it does the needful within a few clicks. Durable, Wix, Zyro by Hostinger, Jimdo, Unbounce, and GetResponse are some other options you can consider.
How much is a professional website cost?
The cost of a professional website differs depending on the method you pick. Generally, you can create a website in three ways, a website builder, WordPress, and an expert website developer. A website builder is perfect if you need a low budget website.
AI website builders like 10Web are available at $10 per month. If you don’t want to spend even this much amount, then Zyro by Hostinger could be a suitable option because it’s available at $2.99 per month and also comes with a free domain. Jimdo is another affordable option. GetResponse is free to use website builder. Other considerable AI builders are Durable, WIX ADI, and Unbounce. They are available to use at $12, $16, and $74 per month.
Creating a website on WordPress costs $10 to $50 per month, depending on your hosting plan. Overall, the average upfront cost to build a professional website is $200 on an average. Hiring an expert is the most expensive idea because its upfront investment could be around $5000.
How much do WordPress websites cost?
You can get low-budget professional WordPress websites with all the free plugins or extensions at anywhere between $50 to $60 per year. So, it’s the minimum investment required to create a website on WordPress. The price range might not fit some of the businesses, but you can get a professional-grade website within this range.
On the other hand, if you purchase a high-quality premium theme and some useful plugins, the expected price for a professional WordPress website could be anywhere between $200 to $350 every year. E-commerce stores cost even higher.
Final Thoughts
We hope now you know how to build, host & manage professional WordPress Websites on a low budget using AI. 10Web has three different plans, wherein the features of the Personal and Pro packages are more or less similar. However, the limits are higher in the latter. The Agency pack extends your limits and is perfect if you manage multiple clients. Its White Label function gives you an upper hand.
Overall, 10Web is one of the best AI builders and hosting platforms for your personal and professional websites. You can start for free. But, all the features are accessible only if you sign up for a free trial or purchase one of the three plans.