A banner with a countdown timer tells your visitors about an ongoing promotional offer. It creates an urgency and puts a little pressure on your potential buyers. Both factors have positive impacts on your conversion rates. Here, we will discuss how to add a countdown timer in website banner in WordPress.
When and why to use a countdown timer in website banner?
A banner with a countdown timer is useful if you want to remind your visitors about a sale, promotional offer, or any other update like a product launch or upcoming event. The timer improves the engagement rate and also builds anticipation. It also induces FOMO (fear of missing out) among your visitors and builds excitement among them.
Check some of the common situations where you enjoy the benefits of a countdown timer.
- On a coming soon page, before launching your business
- While you maintain your website and want to tell when it will be live again
- Before you introduce a new product on your online store
- When you plan an event, press conference, or any other business party
- When you celebrate the annual day or birth date of your business
- To announce sales events like Black Friday sales, Christmas sales, New Year sales, and more
You can showcase the countdown timer banner anywhere on your website, on the top, bottom, sides, or in between the content.
Countdown timer plugin and its types
Read the name and you can easily understand what a countdown plugin is. It’s an extension that allows you to set a banner with a countdown for a specific date and time. You can download, activate, and install one of such plugins to display a countdown timer in the banner of your WordPress website.
Countdown timer plugins can design two types of timers.
Standard: Standard countdown is the most common timer. It counts down to a particular point as set by you. This timer is visible to all your visitors without any changes. For instance, if 50 users visit your website after you start the countdown, they all see the same timer, which could be 4 hours left to grab the offer.
Evergreen: On the other hand, the evergreen banners are dynamic. In simple words, they start the countdown once the visitors arrive on your website. You have to change the settings and the timer follows. For instance, an evergreen countdown timer shows 3 hours of discount to one of your visitors, while another one sees 6 hours left for the same discount.
How to add a countdown timer to the banner?
Check the following methods to add a countdown timer to the banner.
1. Download the plugin
The first step is to download a plugin that can create a banner for you. So, download the WPAnnouncement, and upload it to your WordPress admin panel. You can download WPA from here.
Once it is downloaded, log in to your WordPress panel, click on Plugins from the left menu, and select Add New. Upload the zip files for the plugin, install and activate it.
Then, browse to Announcement, on the left side of your WordPress admin panel and select Add New.
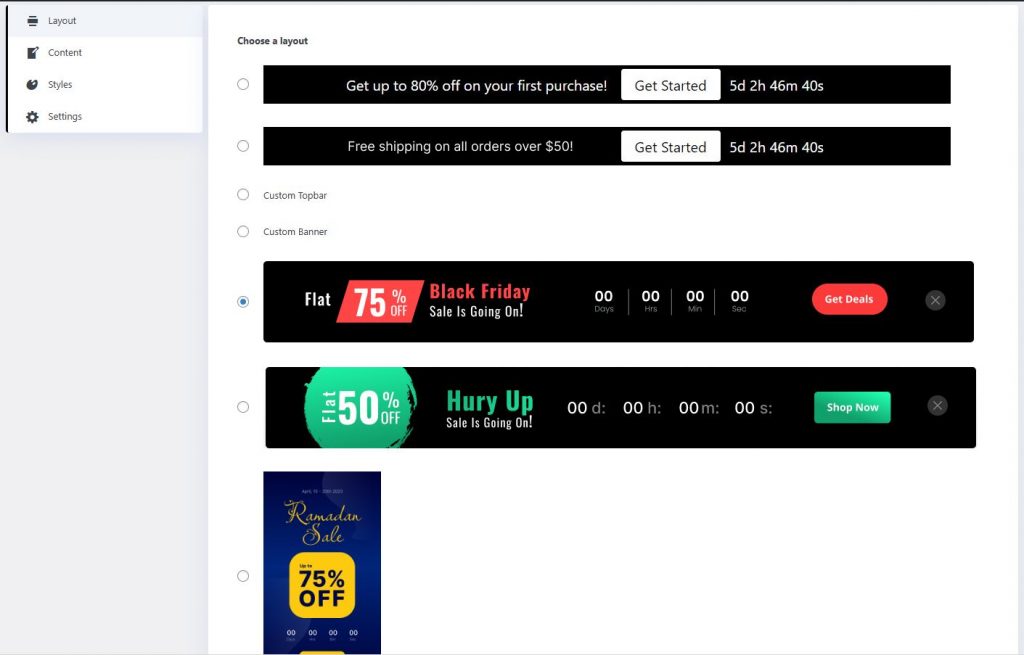
2. Choose a template
The second step is to select a website banner template. WPAnnouncement has a wide range of templates. You can select one of them.
3. Customize the template
You can design the template as per your preferences. First, add the content by clicking on Content. Type a text for offer type, add a message, link the CTA URL, and change other things.

Then, click on Styles for further customization. In this section, you can choose the height of your banner, its position, text color, and more.

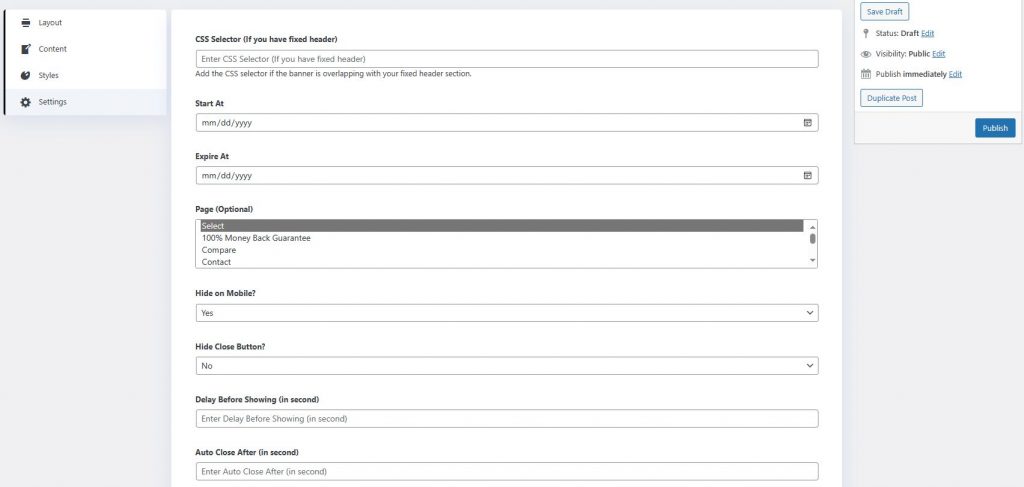
4. Add the countdown timer
Click on Settings to see the options of Start At and Expire At. These two boxes let you select start and stop the countdown times on the website banner. Set the preferred dates.
Select the exact start and end day of the offer. Change other settings and click on Save Draft.
As WPA has several templates, you can try and test as many as banners you want. You can change all the settings of your existing banners by editing them anytime.
Other plugins to add a countdown timer in the banner
1. Countdown Timer Ultimate: The CTU is another top-notch plugin that helps you to add a simple countdown timer to your WordPress website. Download, install, and activate it to add the timers. You can use this plugin for free. If you want to upgrade its premium edition is available at a $99 one-time fee.
2. OptinMonster: You can create impressive popups with the help of OptinMonster. But, it can also help you generate visually appealing banners with a countdown timer. Hence, you can use this plugin to reduce your abandon rate and increase the conversion. It’s pricing starts from $9 per month. No free plans to try this extension.
3. Seedprod: If you want to create landing pages with a countdown timer, try Seedprod. It creates visually appealing landing pages and lets you add a countdown timer to easily grab the attention of your visitors. However, you need the premium version of Seedprod to design countdown timers. Its paid packs start from $39 per year.
4. Elfsight: Elfsight designs responsive countdown timers for your websites. It increases the feeling of urgency among your visitors and hence, boosts the conversion rate. If you want to maximize the festive seasons, try this plugin.
5. Thrive Ultimatum: The Ultimatum is a marketing tool designed to increase the urgency among your visitors and boost your conversion rate. It lets you design visually appealing and time-sensitive offers that give you profits based on FOMO. The price is Thrive Ultimatum is $69 per year.
How to add a countdown timer in the banner using Elementor?
If you use Elementor to design your websites, then you can create banners with a countdown timer with its help. You only need the Countdown Timer Elementor Widget add-on. Elementor can create a countdown timer without any extension. However, its timer lacks some features.
Why use PowerPack Countdown Timer?
- Displays months and years
- Creates two different timer types: Evergreen and fixed
- Wide range of styling and design options for the timer
- Settings and options once the countdown ends
- Labels for hours, minutes, and seconds.
You can use the Countdown Elementor free version to design countdown timers. Also, you have to install and activate the Countdown Timer widget of Powerpack Pro. You can get it here.
Create a countdown timer using Elementor
Use the Elementor editor to open the page where you want to add the countdown timer. Search, drag, and drop the widget of the Countdown Timer.
The next step is to set the timer. The Countdown Timer gives you three different sections to configure your banner, Content, Style, and Advanced.
Content
You can configure the timer under Content> Countdown. It has the following options:
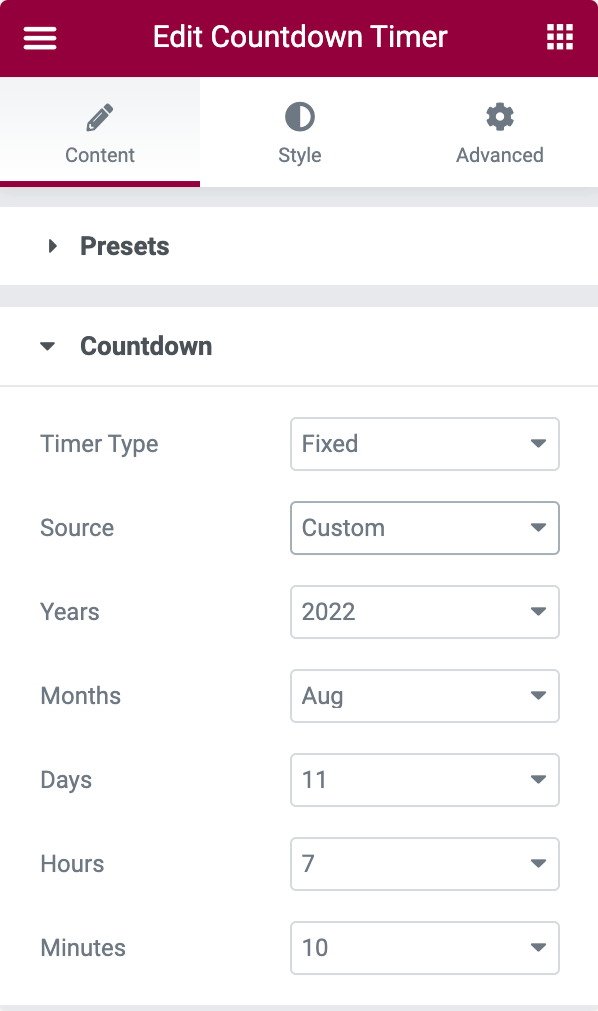
- Timer type: What type of banner do you need? Fixed works until a particular time in the future, but the Evergreen timer only counts a particular period. Select the one you think will work better for your business and motive.
- Source: Here, you can select the PCF source for the countdown timer. It saves a lot of your time.
- Days/Hours/Minutes/Seconds: These sub-options are visible if you select the evergreen timer. Select the period in each box to set the timer.
- Year/Months/Days/Hours/Minutes: In case you select a fixed timer, these sub-options come up. This timer stops at a time predefined by you in these boxes.
Right below Content, you will see Action, which has the following options.
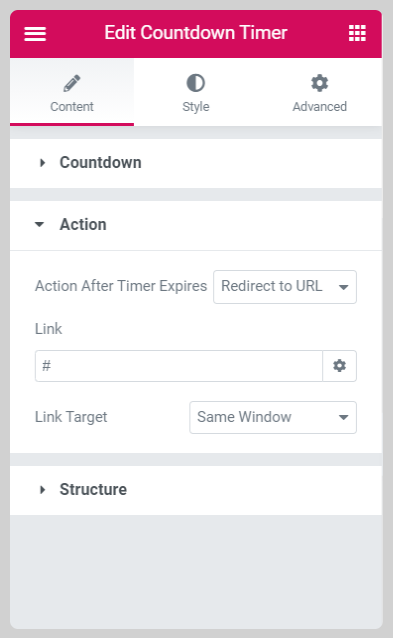
Action after the timer expires: This sub-option allows you a trigger that comes into the picture once the countdown timer is over.
- Hide timer: As you can understand, it hides the countdown once the timer ends.
- Display message: Select this option if you want to show a message after the completion of the countdown timer. Type the message in this box and it appear once the timer ends.
- Redirect to URL: If you select this option, your visitors get redirected to a different webpage. You can set the link in this box.
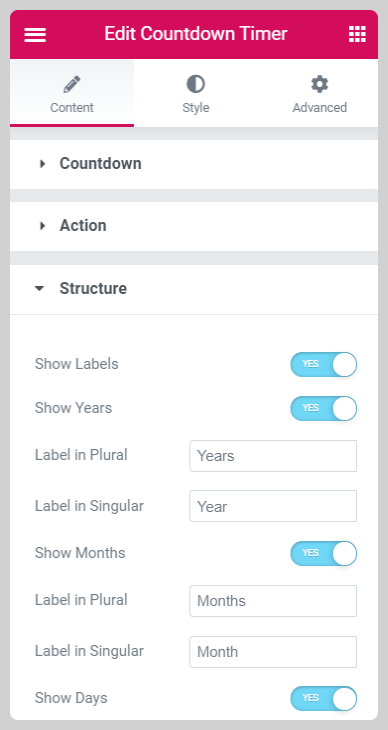
Below Content, you have Structured. This section lets you customize your timer even further. Show Labels lets you show the labels below the counters. With the help of other buttons, you can hide individual counters like the Days, Months, Years, and more.
Style
The next tab is Style, wherein you can make visual changes to the countdown timer. You can customize its texts, colors, positioning, alignment, borders, and more. Check the options one by one to understand their function. If you have used Elementor, you can easily use all the features in this section.
Final thoughts
You can add a countdown timer in the banner with the help of plugins like WPAnnouncement. It’s free to use. Elementor is also a perfect application to add a timer. But, you need its Countdown Timer widget. The pricing for this extension starts from $39.
We hope now you know several ways to create a website banner with a countdown. If you have any questions, let us know in the comments and we will get back to you.